


3 Tips to Get Started Bible Journaling
Updated: Jun 4, 2022
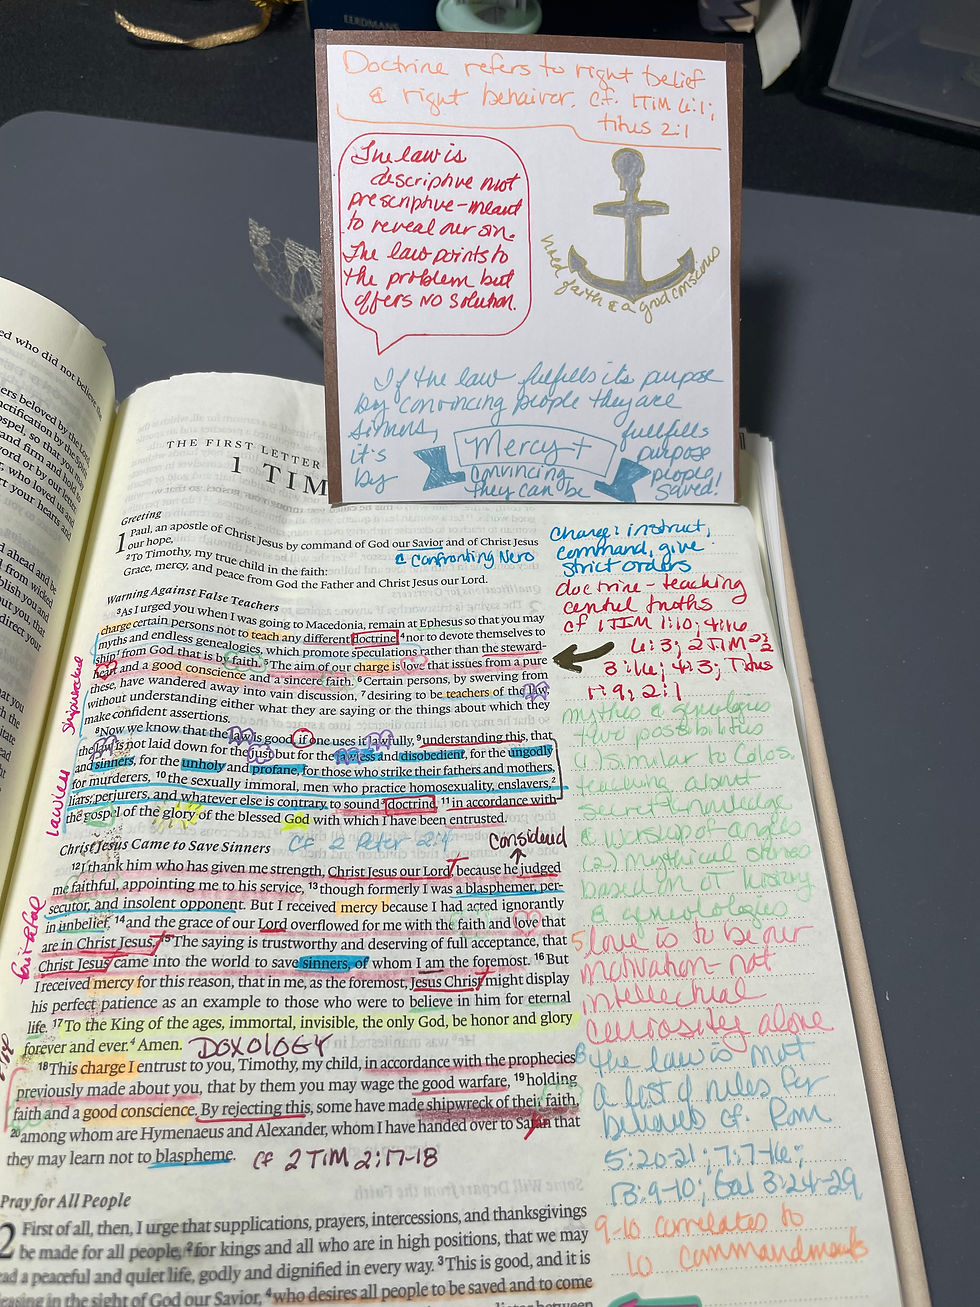
As I promised last week, here are a few tips to get you started Bible journaling. These tips are more for the notetaker style of journaling. I’ve have been using these techniques to keep track of my own observations about the text I’m studying, as well as interesting things I learn in commentaries, sermon notes, and my own personal responses to the text. Make sure you comment and let me know how you engage the Bible and keep track of your notes and observations! Have you had any challenges when it comes to engaging the Bible? Maybe some of these tips will help!
1. Get the right pens and highlighters
I’ve marked in my Bible since I was a kid – I underline, highlight, circle, write, draw, and doodle. Trust me when I say, there is nothing worse than finding that your pen has leaked through to the other side of the paper. Let me save you some frustration and recommend a few of the pens and highlighters I use. If you don’t have any of these, then just do what I do, and test whatever pen you’ll be using on a page in your Bible that isn’t as important. Below I’ve pictured the title page of my Bible where I’ve

tested a number of pens, markers, and highlighters. I love the Illustrated faith pen for writing or drawing. It’s a fairly fin tip at .65 mm but still a good size for my doodles. My go to pen for writing in my Bible is my set of colored Zebra Sarasa. I especially like my gold pen. The tip is .5mm – the perfect size for me to write small yet readable. The Sarasa has a gel pen feel to it without the smudging. If you want a smaller tip or more of a felt tip feel then the Microns are great coming in at just .25 mm. Mr Pen’s fineliners are great for writing or underlining and doodling. They are .4 mm and come in a huge variety of colors. For highlighting I love the Blieve gel highlighters. They have great color and allow me to make marks over them. Mr Pen gel highlighters and a good old crayon are good for highlighting but hard to mark on if you decide to circle a key word later on. The most uninstructed option is a colored pencil, but I have found that they fade so that
in a few years you won’t even be able to tell what you’ve written or highlighted. If you want a marker or brush style pen to be able to do artwork then try Tombow’s dual tipped water base markers. Let me know in the comments what you use in your Bible to highlight and write.
2. Add paper with Tip Ins
If you find that the extra margin space still isn’t enough room for those passages you’re really digging

into, then don’t be afraid to add paper to your Bible. You can do this by glueing the edge into the spine or using washi tape to tape extra note pages in various positions. I also like to use this method for special prayers or responses to a passage that moves me. Another option is post it notes – just make sure you don’t put the sticky parts over words because if they’ve been in your Bible for a while and you try to take them out they will often deface the page a little underneath. I have used the clear post its on several occasions but I have to use a sharpie to write on them or they will smudge easily. You can use any thing from notebook paper, scrapbook paper, or even greeting cards as tip ins. Day Spring makes tip ins especially designed for Bible Journalers. I actually use their tip ins in my planner as well. These tip ins will often have an encouraging message on one side and room to write your own thoughts on the other. By taping only one side of the tip in you create a kind of hinge which you can then use to look at the other side of the paper, without the paper falling out of your Bible all the time.
3. Mark Pages with Tabs and Washi Tape

One last tip to help you find your way around your Bible. You can buy or make Bible tabs that mark every book in the Bible. However, I personally don’t want all those tabs sticking out. Instead, I made tabs for the major sections of Scripture – the Psalms, the Prophets, the Pauline Epistles, etc…. I then use washi tape to line the title page of each book so that it’s still easier to find whatever book I’m looking for – plus I love pretty washi tape. Finally, I use a lot of bookmarks and paper clips to mark the various passages I’m studying and where I am at in my reading. I even glued extra ribbons into the spine of my Bible so that I have more ways to mark where I find myself returning to often in my studies.
One more bonus tip – remember that as fun as it is to engage your Bible creatively – it’s all about what the Holy Spirit is saying. Don’t get so caught up in the “journaling” part that you forget to engage with the Word of God in a transformative way. Journaling isn’t a substitute for study and meditation – only an aid to study and a way of meditating on the Word. Let me know in the comments what tools you use to journal, study, or meditate on the Word.
Next week I will talk more about the artistic side. I’ve been an artist for many years, but only recently started created art in a Bible so I’ll have to let you know what I’m learning! Also, make sure you follow me on instagram and Facebook to see the art I’ll be creating in my Illustrating Bible!



Comments